通过UIDocumentInteractionController预览和分享
前言
朋友分享推荐给我一本PDF格式的史蒂夫•乔布斯传,阅读了几篇,很受感触,于是想把他分享给大家欣赏阅读。早起闲来无事,正好就接着写篇文章来分享一下!我在“iOS实现App之间的内容分享”这篇文章中详细讲解了通过注册UTI的方式让我们的App支持分享,也简单地说了一下App内部怎么处理分享。同时,我也指出了在iOS系统跨App分享内容的几种常用技术,比如URL Scheme,AirDrop, UIDocumentInteractionController,UIActivityViewController这几种。这一篇文章,我们来谈一下最基础的原始方法,怎么通过使用UIDocumentInteractionController来预览、操作和分享史蒂夫•乔布斯传。
简介
从iOS SDK的API文档中,我们可以找到UIDocumentInteractionController的声明:1
NS_CLASS_AVAILABLE_IOS(3_2) __TVOS_PROHIBITED @interface UIDocumentInteractionController : NSObject <UIActionSheetDelegate>
由此声明我们可以得知,UIDocumentInteractionController是从iOS 3.2的SDK开始支持的,它是直接继承的NSObject,而不是我们想象的UIViewController,因此我们需要使用UIDocumentInteractionController提供的方法来展示它,而且我们还可以看出它是不能在Apple TV 的开发中使用的。遍观UIDocumentInteractionController的属性和方法可以看出,UIDocumentInteractionController主要给我们提供了三种用途,我会在下面的内容中逐条的讲解UIDocumentInteraction的每一种用途的具体使用:
- 展示一个可以操作我们分享的文档类型的第三方App列表
- 在第一条展示列表的基础上添加额外的操作,比如
复制,打印,预览,保存等。 - 结合
Quick Look框架直接展示文档内容
准备阶段
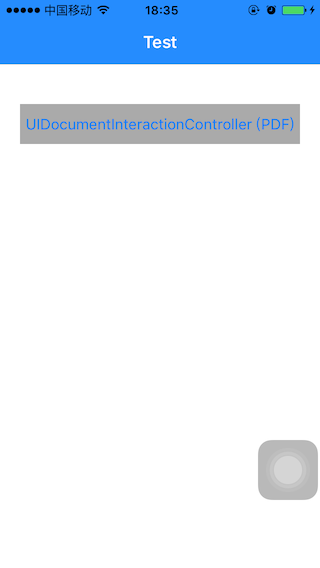
首先我创建了一个新的应用方便演示和截图,我把它命名为ZSDocumentInteractionTest,然后拖入PDF格式的史蒂夫•乔布斯传到ZSDocumentInteractionTest项目的bundle中。然后在Storyboard的ViewController中添加了一个Button作为UIDocumentInteractionController的触发操作(这些操作都比较简单,就不在这里用图展示啦)。运行程序,我们就可以看到Button啦,截图如下。然后我们就可以在Button的触发方法中,操作UIDocumentInteractionController来显示或者分享我们的史蒂夫•乔布斯传啦,具体的应用详情可以参考GitHub上的Demo:ZSDocumentInteractionTest。
初始化
不管我们使用哪种UIDocumentInteractionController的展示方式和用途,都需要给UIDocumentInteractionController指定文档的URL,所以我们通常使用下面的初始化方式,给UIDocumentInteractionController指定文件的URL。1
2
3- (IBAction)presentPDFDocumentInteraction:(id)sender {
UIDocumentInteractionController *documentController = [UIDocumentInteractionController interactionControllerWithURL:[[NSBundle mainBundle] URLForResource:@"Steve" withExtension:@"pdf"]];
}
展示第三方App列表
我们先实现UIDocumentInteractionController的第一个用途,展示可以操作PDF文件的第三方App列表。我们需要使用UIDocumentInteractionController提供的方法:1
- (BOOL)presentOpenInMenuFromRect:(CGRect)rect inView:(UIView *)view animated:(BOOL)animated;
我在Button的触发方法中添加下面的代码,意思就是让UIDocumentInteractionController的View在当前控制器视图上显示:1
[documentController presentOpenInMenuFromRect:self.view.bounds inView:self.view animated:YES];
运行程序,点击Button,我们可以开始第一次展示测试啦。
第一次展示测试
一切准备就绪之后,我开始进行UIDocumentInteractionController的测试,点击Button,就可以看到下面的界面啦。这说明我们的第一步成功了!!(真棒)
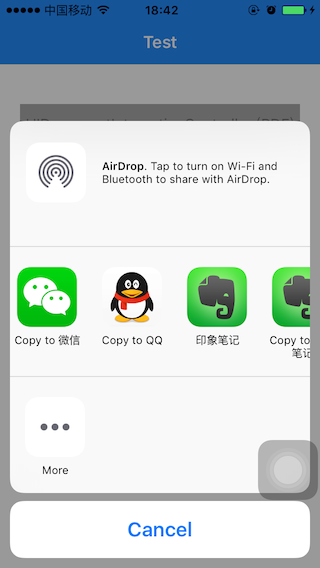
简单介绍一下这个界面,这个视图中的第一行列表显示AirDrop,是苹果在iOS 7提供的一种跨设备分享的技术,我会在后边的文章中讲解。视图中的第二行列表就是整个iOS系统中,可以操作PDF文档的应用程序列表,还包括了苹果在iOS 8提供的Share Extension图标,关于Share Extension,我会在后边的文章中讲解。视图中的第三行列表,就是现实设备可选的操作,如Copy,Print中,这里什么操作都没有,并不是说没有可执行的操作,而是我们没有让他显示出来。
接着我试着点击QQ图标,打算把史蒂夫•乔布斯传分享给我的好友,然而意外发生了,ZSDocumentInteractionTest崩溃掉啦,而且还给出我们一段错误提示:1
2
3
4
52015-12-30 19:00:40.078 ZSDocumentInteractionTest[1254:344240] *** Assertion failure in -[_UIOpenWithAppActivity performActivity], /BuildRoot/Library/Caches/com.apple.xbs/Sources/UIKit/UIKit-3512.29.5/UIDocumentInteractionController.m:408
2015-12-30 19:00:40.079 ZSDocumentInteractionTest[1254:344240] *** Terminating app due to uncaught exception 'NSInternalInconsistencyException', reason: 'UIDocumentInteractionController has gone away prematurely!'
*** First throw call stack:
(0x248e185b 0x35fa2dff 0x248e1731 0x25672ddb 0x290638c9 0x292695bb 0x28d5aefd 0x28d5e1a1 0x28b42107 0x28a50a55 0x28a50531 0x28a5042b 0x282e05cf 0x1acd03 0x1b17c9 0x248a4535 0x248a2a2f 0x247f50d9 0x247f4ecd 0x2db6aaf9 0x28a7e2dd 0x780ad 0x366f0873)
libc++abi.dylib: terminating with uncaught exception of type NSException
我看到错误提示竟然指向了UIDocumentInteractionController.m文件,而且错误提示是NSInternalInconsistencyException(内部不一致)和”UIDocumentInteractionController has gone away prematurely!”(UIDocumentInteractionController过早地被释放掉啦)。由此我想出这个应该是内存过早释放的一个错误,然后我查阅了一下Apple Developer上的文档,原来,在ARC环境下展示UIDocumentInteractionController时,当我的函数方法调用完毕,退栈之后,UIDocumentInteractionController的实例就被释放掉了,展示出来的这个View由Quick Look框架来操作,并不会对UIDocumentInteractionController产生引用。当点击View上面的Button时,内部操作仍然会继续访问这个UIDocumentInteractionController实例,就会报出上述错误。
错误原因找到了,那么解决原理也就清楚了,只要不让UIDocumentInteractionController实例过早释放就可以啦。我们可以将UIDocumentInteractionController声明为一个strong类型的实例属性,然后修改一下Button触发方法就可以啦。(仍然不理解的朋友可以去GitHub上下载Demo测试)1
2
3@interface ViewController ()
@property (nonatomic, strong) UIDocumentInteractionController *documentController;
@end
我在Button的触发方法中添加下面方法的调用,为了方便区分和理解,我把代码封装成了私有实例方法:1
2
3
4
5
6
7
8
9
10- (void)presentOpenInMenu
{
// display third-party apps
[self.documentController presentOpenInMenuFromRect:self.view.bounds inView:self.view animated:YES];
}
- (IBAction)presentPGNDocumentInteraction:(id)sender {
_documentController = [UIDocumentInteractionController interactionControllerWithURL:[[NSBundle mainBundle] URLForResource:@"Steve" withExtension:@"pdf"]];
[self presentOpenInMenu];
}
修改完之后,运行程序,然后点击Button,看到第一次测试时展示出来的图片啦。然后再点QQ图标,就可以正确地跳转到QQ程序中,选择好友就可以分享史蒂夫•乔布斯传啦。(QQ接收分享页面就不展示了,想试验的可以手动测试下)
展示可选操作
我们可以看到第一步图示里面只有App图标,第二行操作列表中只有一个More。所以我们来展示UIDocumentInteractionController的第二种用途,在第一步的基础之上,显示附加的操作选项,。这需要我们使用UIDocumentInteractionController提供的另外一种展示方法:1
- (BOOL)presentOptionsMenuFromRect:(CGRect)rect inView:(UIView *)view animated:(BOOL)animated;
我们在Button的触发方法中添加下面方法的调用:1
2
3
4
5- (void)presentOptionsMenu
{
// display third-party apps as well as actions, such as Copy, Print, Save Image, Quick Look
[_documentController presentOptionsMenuFromRect:self.view.bounds inView:self.view animated:YES];
}
运行程序,点击Button,我们可以看到下面的界面,多了Copy和Print的操作。Copy操作可以将文件拷贝到系统粘贴板中,而Print操作则是关联打印机进行打印操作的。(在这里我就不展示这俩种操作的具体界面啦!)
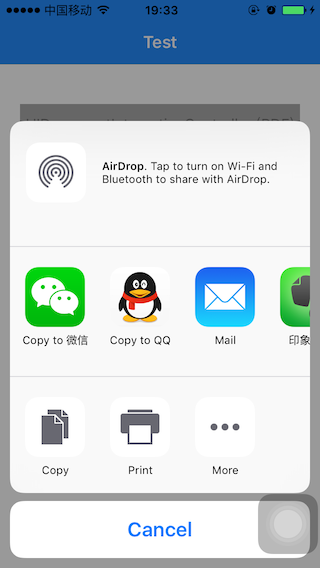
如果UIDocumentInteractionController关联的是一个图片文件,这个界面还会提供一个Save Image的操作,用来直接保存图片到系统的Photos中,此外这个界面还提供了一个Quick Look操作,可以让我们直接预览乔布斯自传PDF文档,只不过需要我们再多写点代码,为了文章的合理性和结构性,我决定在下面的标题内容中讲解。(先卖个小关子!!)
直接预览
UIDocumentInteractionController第三种预览文档内容的用途非常重要,而且也是常见的。我会详细地说一下如何通过UIDocumentInteractionController实现预览史蒂夫•乔布斯传。首先你需要为UIDocumentInteractionController指定一个delegate,并且实现下面的代理方法:1
- (UIViewController *)documentInteractionControllerViewControllerForPreview:(UIDocumentInteractionController *)controller;
这个代理方法主要是用来指定UIDocumentInteractionController要显示的视图所在的父视图容器。这样UIDocumentInteractionController才清楚在哪里展示Quick Look预览内容, 我在这里就指定Button所在的UIViewController来做UIDocumentInteractionController的代理对象,并且实现上面的代理方法。在Button的触发方法中添加下面的代码
1 | _documentController.delegate = self; |
然后实现代理方法:1
2
3
4- (UIViewController *)documentInteractionControllerViewControllerForPreview:(UIDocumentInteractionController *)controller
{
return self;
}UIDocumentInteractionController是继承自NSObject的,因而为了能够实现直接预览,我们需要用到UIDocumentInteractionController提供的展示预览的方法,1
- (BOOL)presentPreviewAnimated:(BOOL)animated;
这个方法是以模态窗口通过Quick Look框架全屏显示PDF的内容,所以我们在Button的触发方法中添加下面方法的调用:1
2
3
4
5- (void)presentPreview
{
// display PDF contents by Quick Look framework
[self.documentController presentPreviewAnimated:YES];
}
然后运行程序,点击Button,弹出了一个新视图,可以看到史蒂夫•乔布斯传的内容,如下图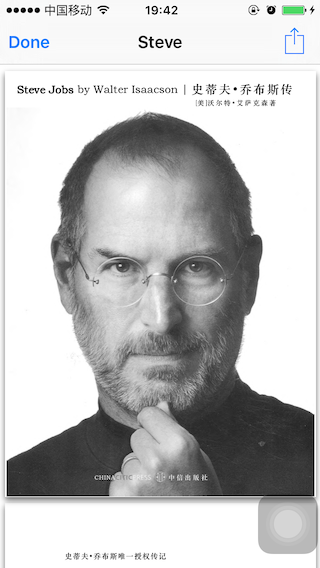
展示预览操作
通过上面的操作我们就可以欣赏阅读我们想看的史蒂夫•乔布斯传啦,不过别忘记我们上面还卖了一个小关子,就是在展示可选操的时候,除了Copy,Print,其实我们还可以展示Quick Look这个预览操作。为什么我要卖关子呢,因为我是一个相信因果循环的人,我组织文章的逻辑是由浅入深,我设想通过一步步铺垫来展开UIDocumentInteractionController所有特性。
好啦,回归正题!我们想要实现显示Quick Look预览操作,其大部分的工作在直接预览这一小节中都做完了,比如指定代理对象,然后实现这个代理方法来指定UIDocumentInteractionController的父视图容器:
1 | - (UIViewController *)documentInteractionControllerViewControllerForPreview:(UIDocumentInteractionController *)controller; |
由于我们已经做完了所有准备,在这一步,我们只需要将直接展示史蒂夫•乔布斯传内容的方法替换为下面这段,展示可选操作列表的方法,就可以啦!1
2
3
4
5- (void)presentOptionsMenu
{
// display third-party apps as well as actions, such as Copy, Print, Save Image, Quick Look
[_documentController presentOptionsMenuFromRect:self.view.bounds inView:self.view animated:YES];
}
然后我们运行程序,点击Button,就可以看到Quick Look操作已经显示出来啦!如下图: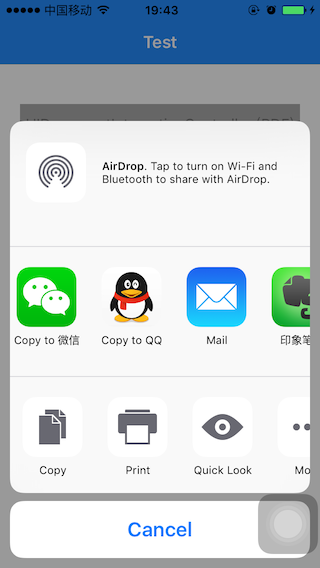
如果我们点击这个Quick Look操作,就可以看到直接预览内容时所展示的界面啦。好啦,通过UIDocumentInteractionController实现史蒂夫•乔布斯传的预览和分享就到此结束啦。我会在下面的章节中,讲解通过其他技术实现乔布斯自传的分享和操作。

